Key takeaways
- Step 1: Locate your motherboard fan headers. Open your computer chassis and identify the 3-pin or 4-pin system fan headers (often labeled as SYS_FAN, CHA_FAN, or CPU_OPT). Note their exact positions relative to where your fans will be mounted.
- Step 2: Identify your fan groupings. Decide which fans you want to group together on a single splitter. Typically, you should group fans of the same size and model (such as two front intake fans or two top exhaust fans) so they run at identical speeds.
- Step 3: Measure the routing path. Do not measure in a straight, diagonal line across your components. Instead, use a piece of flexible string to trace the path the cable will actually take. Route the string from the motherboard header, through the nearest cable routing grommet, behind the motherboard tray, and out to the connection point of your fans.
- Step 4: Measure the string and add a safety margin. Lay the string flat against a tape measure or ruler. Note the length in inches or centimeters. Add at least 1 to 2 inches (2.5 to 5 cm) of slack to this measurement. This ensures the cable will not be under tension, which can damage both the splitter and the motherboard header over time.
- Step 5: Check fan amperage ratings. Look at the sticker on the back of your cooling fans. Find the amperage rating (for example, “0.15A”). Add the ratings of the fans you plan to connect to the splitter. Ensure the total sum does not exceed 1.0 Amp. If you are using three 0.25A fans, the total is 0.75A, which is perfectly safe.
What's inside
A clean, quiet, and well-ventilated workspace is the cornerstone of any modern home office or entertainment hub. Whether you are building a high-performance workstation for video editing, setting up a silent home theater PC (HTPC) in your living room, or keeping a smart home server cabinet cool, managing airflow is crucial. However, most motherboards only come with a limited number of system fan headers, leaving you with more cooling fans than places to plug them in.
This is where a fan splitter becomes an indispensable tool. By allowing multiple fans to draw power and control signals from a single motherboard header, you can optimize your cooling layout without cluttering your system. But choosing the correct splitter is not just about grabbing the first cable you see. You must consider physical length, split capacity (the number of “ways”), and electrical limitations to ensure your system runs safely and efficiently. If you are asking yourself, “what size fan splitter do i need,” this comprehensive guide will break down standard dimensions, electrical capacities, and specific use cases to help you make the perfect choice.
As an Amazon Associate we earn from qualifying purchases at no extra cost to you. Product prices and availability are accurate as of the date shown and are subject to change.


The Short Answer
When determining what size fan splitter you need, you must evaluate two distinct measurements: **physical cable length** and **split capacity (number of ports)**.
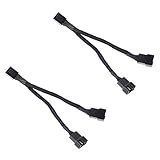
For compact home office setups or Small Form Factor (SFF) computer cases, a short **4-inch (10 cm) 2-way splitter** is ideal. This length prevents unnecessary cable clutter and maintains clean airflow pathways. For standard mid-tower or full-tower ATX cases, you will need a longer **11-inch to 12-inch (28 cm to 30 cm) 2-way or 3-way splitter** to comfortably reach from your motherboard headers to your intake or exhaust fan mounts.
From an electrical perspective, standard motherboard fan headers support a maximum current of **1.0 Amp (12 Watts)**. Because standard 120mm and 140mm computer fans typically pull between 0.1A and 0.3A, you can safely split a single header to power **two or three fans**. Attempting to connect four or more fans to a single header via basic splitters can overload the motherboard and cause permanent hardware damage.
Standard Sizes
Fan splitters come in standardized configurations designed to accommodate different chassis layouts and fan counts. The table below outlines the most common sizes available on the market, their physical dimensions, and their typical applications.
| Splitter Type | Length (Inches) | Length (Metric) | Power Capacity Limit | Best For | Typical Price Range |
|---|---|---|---|---|---|
| Ultra-Short 2-Way (1 to 2) | 4 inches | 10 cm | 1.0 Amp / 12W | Mini-ITX cases, close-range top exhausts, and clean cable management | $4.00 – $7.00 (2-Pack) |
| Standard 2-Way (1 to 2) | 8 to 10 inches | 20 to 25 cm | 1.0 Amp / 12W | Micro-ATX builds, connecting rear exhaust and top fans to central headers | $4.50 – $8.00 (2-Pack) |
| Long 3-Way (1 to 3) | 11 to 12 inches | 28 to 30 cm | 1.0 Amp / 12W | ATX mid-towers, triple front-intake fan arrays, and radiator cooling | $5.00 – $9.00 (2-Pack) |
| SATA-Powered Fan Hub (1 to 10) | 15+ inches (main cable) | 38+ cm | 4.5 Amps / 54W | Dual-system cases, heavy workstation cooling, and extensive RGB setups | $10.00 – $20.00 (Single) |
How to Measure Your Space
To avoid purchasing a cable that is too short to reach your fans, or so long that it bunches up and blocks your system’s airflow, follow this step-by-step measurement guide before making your purchase.
- Step 1: Locate your motherboard fan headers. Open your computer chassis and identify the 3-pin or 4-pin system fan headers (often labeled as SYS_FAN, CHA_FAN, or CPU_OPT). Note their exact positions relative to where your fans will be mounted.
- Step 2: Identify your fan groupings. Decide which fans you want to group together on a single splitter. Typically, you should group fans of the same size and model (such as two front intake fans or two top exhaust fans) so they run at identical speeds.
- Step 3: Measure the routing path. Do not measure in a straight, diagonal line across your components. Instead, use a piece of flexible string to trace the path the cable will actually take. Route the string from the motherboard header, through the nearest cable routing grommet, behind the motherboard tray, and out to the connection point of your fans.
- Step 4: Measure the string and add a safety margin. Lay the string flat against a tape measure or ruler. Note the length in inches or centimeters. Add at least 1 to 2 inches (2.5 to 5 cm) of slack to this measurement. This ensures the cable will not be under tension, which can damage both the splitter and the motherboard header over time.
- Step 5: Check fan amperage ratings. Look at the sticker on the back of your cooling fans. Find the amperage rating (for example, “0.15A”). Add the ratings of the fans you plan to connect to the splitter. Ensure the total sum does not exceed 1.0 Amp. If you are using three 0.25A fans, the total is 0.75A, which is perfectly safe.
By Room or Use Case
The ideal size and configuration of your fan splitter depend heavily on where your system is located and how it is used. Different spaces demand different thermal profiles, aesthetic standards, and noise limits.
Compact Home Office & SFF Desk Setups
If you work from a compact desk with a Mini-ITX or Small Form Factor (SFF) computer, space inside your chassis is at a premium. In these tight environments, long cables are a major liability; they block critical exhaust paths, collect dust, and make closing the side panel a challenge. For these setups, a short **4-inch 2-way fan splitter** is the perfect fit. It provides just enough length to connect two nearby 120mm slim fans to a single header, keeping the interior looking immaculate and maintaining unobstructed airflow across your components.
Standard Family PC & Gaming Mid-Towers
For a standard family computer or a mid-tower gaming PC housed in an ATX chassis (typically measuring around 18 inches tall and 18 inches deep), you will need more reach. Motherboard headers are often clustered near the center or bottom-right of the board, while intake fans sit at the very front of the case. To bridge this gap cleanly behind the motherboard tray, an **11-inch or 12-inch 3-way PWM splitter** is recommended. This size allows you to group three 120mm front intake fans into a single cohesive cooling unit controlled by a single temperature curve in your system’s BIOS.
Home Theater PCs & Media Cabinets
Media centers and home theater setups often feature specialized horizontal cases or are tucked away inside wooden entertainment consoles. Ventilation in these enclosed spaces is notoriously poor. To keep your console cool, you might need to mount exhaust fans directly to the back of your wooden media furniture. This setup requires routing cables out of the PC chassis and through cabinet grommets. For this use case, long **12-inch splitters**, or even passive extension cables paired with a splitter, are necessary to span the physical distance between the PC and the furniture’s integrated exhaust ports.
Silent Creative Studios
For professional audio engineers, video editors, and digital artists working in quiet home studios, fan noise is the enemy. To maintain a whisper-quiet environment, you must use 4-pin PWM (Pulse Width Modulation) fan splitters rather than older 3-pin models. PWM splitters allow your system to dynamically adjust fan speeds from 20% to 100% capacity based on real-time temperatures. Ensure you buy a high-quality, black-sleeved **11-inch 2-way PWM splitter** to run dual low-RPM exhaust fans, keeping your workspace silent during delicate recording or rendering sessions.
Common Sizing Mistakes
Avoiding these common pitfalls will save you from system instability, cable clutter, and potential hardware damage:
- Buying too much cable length: Opting for a 12-inch splitter when a 4-inch splitter would suffice results in a bird’s nest of cables that must be stuffed into the bottom of your case, trapping heat and dust.
- Overloading the motherboard header: Daisy-chaining multiple splitters together to run four or five high-performance fans off a single header can draw more than 1.0 Amp of current. This can burn out the motherboard’s fan controller header, requiring a costly motherboard replacement.
- Confusing 3-pin and 4-pin connectors: Standard 3-pin splitters do not support PWM speed control. If you connect 4-pin PWM fans to a 3-pin splitter, your fans will run at 100% speed constantly, creating an incredibly loud and distracting workspace.
- Measuring without routing routing curves: Forgetting that cables must turn corners and route through tight cutouts can result in buying a cable that is just an inch too short, forcing you to stretch the wire dangerously tight.
FAQ
Can I use a 4-pin PWM splitter on a 3-pin motherboard header?
Yes, 4-pin PWM splitters are fully backward-compatible with 3-pin headers. The connector keys are designed to align correctly. However, note that when using a 3-pin header, you will lose precise PWM speed control, and your fans will run at full speed unless your motherboard supports voltage-based (DC) regulation in the BIOS settings.
What is the maximum length a fan splitter cable can be before losing signal?
For standard 12V PC fan signals, you can safely run cables up to 24 inches (60 cm) without experiencing voltage drop or PWM signal degradation. If your installation requires routing cables further than 24 inches, you should transition to a dedicated, SATA-powered fan hub to ensure stable power delivery.
Why does only one connector on my fan splitter have four metal pins?
This is an intentional safety and design feature, not a manufacturing defect. A motherboard can only read one RPM (revolution speed) signal per header. If multiple fans sent speed data back to the same header simultaneously, the readings would conflict and confuse the motherboard’s controller. Therefore, only one connector on the splitter passes the RPM feedback signal (using all four pins), while the other connectors only have three pins to deliver power, ground, and control signals.
How much do quality fan splitters cost in 2026?
Fan splitters remain a highly affordable upgrade. In 2026, standard 2-packs of high-quality, sleeved 2-way or 3-way splitters generally cost between $4.50 and $9.00. Premium options with heavy-duty braided sleeving or ultra-thin flat profiles tend to sit at the higher end of that range, while simple unsleeved ribbon cables are available at the lower end.