Key takeaways
- Install the CPU, then the RAM, and mount the cooler onto the motherboard first, outside the case.
- Install the power supply and standoffs in the case, then mount the motherboard.
- Seat the graphics card in the top PCIe slot and secure it.
- Connect storage, then route and plug in every power and data cable.
What's inside
- Watch: How to Build a Gaming PC (2026 Beginner’s Guide) — Video Review
- Plan Your Parts List and Budget
- Prepare Your Workspace and Tools
- Assemble in the Right Order
- Cable Management and Power Connections
- First Boot and BIOS Setup
- Tips
- Related Guides
- Frequently Asked Questions
- Conclusion
- Related Articles
- Related Guides
Building your own gaming PC in 2026 can feel intimidating from the outside, but the process is really just careful assembly of parts that only fit one correct way. Doing it yourself lets you choose exactly the performance you want, avoid paying for bloatware, and understand your machine well enough to upgrade or fix it later without a service fee.
- Watch: How to Build a Gaming PC (2026 Beginner’s Guide) — Video Review
- Plan Your Parts List and Budget
- Prepare Your Workspace and Tools
- Assemble in the Right Order
- Cable Management and Power Connections
- First Boot and BIOS Setup
- Tips
- Related Guides
- Frequently Asked Questions
- Conclusion
- Related Articles
- Related Guides
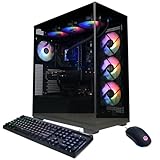
This beginner’s guide walks through the full journey, from picking compatible parts to that first successful boot. If assembling everything yourself still feels like a step too far right now, a well-specced prebuilt like the KOTIN RTX 5070 desktop, the Alienware Aurora, or a CyberPowerPC Gamer Xtreme gives you a proven starting point while you learn the ropes.
As an Amazon Associate we earn from qualifying purchases at no extra cost to you. Product prices and availability are accurate as of the date shown and are subject to change.




⚡ Save on Your Next PC — Amazon Prime
Prime members get fast free shipping on the systems above, plus early access to Prime Day & Black Friday PC deals. New members get a 30-day free trial.
Watch: How to Build a Gaming PC (2026 Beginner’s Guide) — Video Review
Plan Your Parts List and Budget
Every build starts with a compatible parts list. The core components are the CPU, motherboard, RAM, graphics card, storage, power supply, cooler, and case. Decide your target resolution and frame rate first, then let the GPU anchor the budget since it drives gaming performance the most. Use a compatibility checker to confirm the CPU socket matches the motherboard, the RAM is the right DDR generation, and the case fits your GPU and cooler.
Prepare Your Workspace and Tools
You need surprisingly little: a Phillips screwdriver, a clear well-lit table, and a little patience. Work on a hard surface rather than carpet, keep the small screws organized in cups, and touch a metal part of the case periodically to discharge static electricity. Read the motherboard manual before you start, because it is the single best reference for where every cable and component goes.
Assemble in the Right Order
Building in the correct sequence saves frustration. A reliable order is:
- Install the CPU, then the RAM, and mount the cooler onto the motherboard first, outside the case.
- Install the power supply and standoffs in the case, then mount the motherboard.
- Seat the graphics card in the top PCIe slot and secure it.
- Connect storage, then route and plug in every power and data cable.
Working outside the case for the CPU, RAM, and cooler gives you room and reduces the chance of a bad mount.
Cable Management and Power Connections
Take your time with cables, both for airflow and for a clean look. Route power leads behind the motherboard tray where possible, and double-check the big connectors: the 24-pin motherboard power, the CPU power near the top of the board, and the PCIe power to the GPU. A single loose power cable is the most common reason a first build refuses to turn on.
First Boot and BIOS Setup
Before closing the case, do a test boot. Connect a monitor to the graphics card (not the motherboard), power on, and enter the BIOS. Confirm the CPU, RAM, and storage are all detected, enable the memory’s XMP or EXPO profile so it runs at rated speed, then install your operating system and the latest GPU drivers. Only after a successful boot should you tidy the final cables and close it up.
Tips
- Plug your monitor into the graphics card’s ports, not the motherboard’s, or you will get no signal.
- Enable XMP or EXPO in the BIOS; without it your fast RAM runs at slow default speeds.
- Do a test boot outside or with the case open before final cable management, so troubleshooting is easy.
- Keep every manual and box until the build is confirmed stable, in case you need to return a part.
Frequently Asked Questions
Is building a gaming PC cheaper than buying prebuilt?
It often saves money and always gives you better part selection, but the gap narrows during sales on prebuilts. Building also teaches you to upgrade and repair the machine yourself, which pays off over time.
How long does a first build take?
Plan for two to four hours for your first build, including reading the manual and careful cable management. Experienced builders do it faster, but there is no reward for rushing.
What do I do if the PC won’t turn on?
Recheck every power connector, especially the 24-pin, CPU, and GPU cables, then confirm the RAM is fully seated and the front-panel power switch header is connected correctly. Loose connections cause most no-boot situations.
Do I need a separate CPU cooler?
Some CPUs include a stock cooler, but many high-performance chips do not. Check whether yours ships with one, and budget for an aftermarket cooler if it does not or if you want lower temperatures.
Conclusion
Building a gaming PC rewards patience far more than technical wizardry: choose compatible parts, assemble in a sensible order, connect every cable with care, and verify everything at first boot before closing the case. Follow those steps and you will end up with a machine tuned exactly to your needs, plus the confidence to upgrade it for years to come.