Key takeaways
- Unplug the keyboard first, or turn off a wireless board, before doing anything.
- Turn it upside down and shake gently to dislodge loose crumbs and dust.
- Use compressed air in short bursts between the keys to blow out debris from around the switches.
- Wipe the keycaps and case with a microfiber cloth lightly dampened with isopropyl alcohol to lift oils and fingerprints.
What's inside
A mechanical keyboard is a precision instrument you touch thousands of times a day, and over months it quietly collects dust, crumbs, skin oils, and the occasional coffee splash. Left alone, that grime dulls the keycaps, makes switches feel scratchy or sticky, and can eventually cause keys to chatter or stop registering. Regular cleaning keeps your board feeling crisp, looking sharp, and lasting for years, and because mechanical keyboards are built to be serviced, it’s a task any owner can do safely at home.
This guide walks through how to clean a mechanical keyboard properly in 2026, from a quick weekly tidy to a deep clean with the keycaps removed. You’ll learn what tools to use, how to avoid damaging your switches or electronics, and how to keep hot-swappable and non-removable boards alike in top condition without risking a costly mistake.
As an Amazon Associate we earn from qualifying purchases at no extra cost to you. Product prices and availability are accurate as of the date shown and are subject to change.


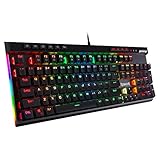
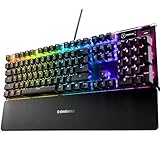


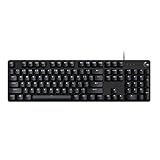

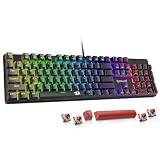
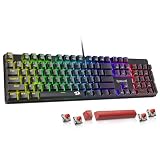
These maintenance principles apply to any board, whether you own a hot-swappable model like the AULA F75 Pro or Redragon’s hot-swap keyboard, a mainstream pick such as the Razer BlackWidow V4 X or Logitech G413 SE, or a spill-resistant option like the SteelSeries Apex 3. Knowing your board’s type, especially whether keycaps and switches are removable, shapes exactly how deep you can safely clean.
⚡ Save on Your Next PC — Amazon Prime
Prime members get fast free shipping on the systems above, plus early access to Prime Day & Black Friday PC deals. New members get a 30-day free trial.
Watch: How to Clean a Mechanical Keyboard — Video Review
Gather the Right Tools
Before you start, assemble a small cleaning kit so you don’t improvise with the wrong materials. You’ll want a keycap puller (often included with hot-swap boards like the AULA F75 Pro), a soft brush or clean paintbrush, a can of compressed air, cotton swabs, microfiber cloths, and isopropyl alcohol of 90% or higher for stubborn grime. Have a bowl of warm soapy water ready if you plan to wash keycaps. Avoid harsh household cleaners, paper towels that shed lint, and anything abrasive that could scratch keycaps or legends.
The Quick Weekly Clean
- Unplug the keyboard first, or turn off a wireless board, before doing anything.
- Turn it upside down and shake gently to dislodge loose crumbs and dust.
- Use compressed air in short bursts between the keys to blow out debris from around the switches.
- Wipe the keycaps and case with a microfiber cloth lightly dampened with isopropyl alcohol to lift oils and fingerprints.
The Deep Clean: Removing Keycaps
Every few months, do a thorough clean. With the board unplugged, photograph your layout so you can put keycaps back correctly, then use a keycap puller to remove them, rocking gently and pulling straight up. Never yank larger stabilized keys carelessly. Wash the keycaps in warm, mildly soapy water, rinse, and lay them out to dry completely, this can take several hours, so be patient. Never reinstall damp keycaps. Meanwhile, brush and blow out the exposed plate and switches. Do not submerge the keyboard body itself; the electronics must stay dry.
Cleaning Switches and Handling Spills
For scratchy switches on a non-hot-swappable board, a cotton swab lightly dampened with isopropyl alcohol around the switch housing helps, but avoid soaking them. On hot-swappable boards you can pull individual switches with a switch puller to clean or replace them, a real advantage of that design. If you spill liquid, act fast: unplug immediately, turn the board upside down to drain, and let it dry fully for 24-48 hours before powering on. Sugary or sticky spills usually need keycap removal and careful cleaning around the affected switches.
Drying and Reassembly
Reassembly mistakes cause most cleaning mishaps, so slow down. Confirm every keycap and the keyboard interior are bone dry before putting anything back, moisture near contacts risks shorts or corrosion. Reference your layout photo and press each keycap firmly straight down until it seats with a click. Reattach stabilized keys like the spacebar and Enter carefully so the stabilizer wires align. Once everything is back in place, plug in and test every key. Taking your time here protects both the board’s function and its finish.
Tips
- Always unplug or power off the keyboard before cleaning to avoid accidental input or electrical damage.
- Photograph your key layout before pulling keycaps so reassembly is quick and error-free.
- Let washed keycaps dry completely for several hours; installing them damp can trap moisture near the switches.
- Keep food and drinks away from the board and do a quick weekly wipe-down to make deep cleans faster and rarer.
Frequently Asked Questions
How often should I clean my mechanical keyboard?
A quick surface clean weekly and a deep clean with keycaps removed every two to three months suits most users. If you eat at your desk or share the space with pets, clean more often to stay ahead of buildup.
Can I use water to clean the keycaps?
Yes, keycaps can be washed in warm, mildly soapy water and rinsed, then dried thoroughly. Just never submerge the keyboard body or its electronics; only the removed keycaps should touch water, and they must be completely dry before reinstalling.
What should I do if I spill liquid on my keyboard?
Unplug it immediately, flip it upside down to let liquid drain, and let it dry for 24-48 hours before powering on. Sticky or sugary spills usually require removing keycaps and cleaning around the affected switches with isopropyl alcohol.
Is it safe to remove the keycaps myself?
Yes, mechanical keyboards are designed for it. Use a keycap puller, pull straight up with gentle rocking, and be extra careful with larger stabilized keys. Photograph the layout first so you can put everything back in the right place.
Conclusion
Cleaning a mechanical keyboard is simple once you know the routine: a quick weekly wipe and air-blow keeps grime from building, while an occasional deep clean with the keycaps removed restores that fresh, crisp feel. Always unplug first, keep the electronics dry, and let washed keycaps fully dry before reassembly. Treat your board to this regular care and it will stay responsive, look great, and easily outlast the cheaper membrane keyboards it replaced, giving you years of satisfying keystrokes.